Showing posts with label Gift Tag. Show all posts

Wednesday, November 29, 2023

Tiny Gift Bags Using your Stampin’ Up! Scrap Paper

EVERY year I find I am scrambling to wrap up the gift cards, jewelry and even perfume... enter the hero of the Christmas Gift Wrap (it is great for birthdays, weddings and more all year long)... the TINY Gift Bag!! I love these little gift bags for many reasons.. from using up my scrap paper to keeping a stock of these on hand for quick needs... and creating them is so much fun!  Join us on our Third of the Twelve Crafty Days of Christmas where you will WOW others this holiday season and even have a chance to WIN a NEW Stampin' Cut & Emboss Machine!

Getting Crafty November/December 2023 

*Hostess Code Z9R9YPAC
- JUST COPY & PASTE THIS CODE

**OR... If you Order $150 or more - Score the Hostess Shopping Spree !!


Create this Tiny Gift Bags Using your Stampin’ Up! Scrap Paper Video Tutorial 
I hope that you enjoyed this Video
Don't forget to Sign Up and Follow my Getting Crafty YouTube Channel 

Catch our weekly LIVES and Videos on

You can create this to just the gift bag or elevate it with a die-cut gift tag and some holographic die-cut and embossed stars!!
Capture the rainbow with this stunning paper!
Recipe:
~  Taking TWO 6"x6" pieces of this Snowflake Magic paper and the Simply Scored board, score two sides at 1", the bottom at 1-1/2" and the top at 1/2" (I stacked the two sheets as I was scoring).
~ Using the Bone Folder, score the flaps,
~  Snip in the 1-1/2" bottom (see the video tutorial) to make a flap.
~  Using Stampin' Seal +, seal up this bag.
~  Assemble the bag and punch the holes to create the handle.
~  Tie the ribbon with a sassy double knot (add the tag if you want NOW, before the second tie/side).

Spice It Up:
Elevate this with the Stars at Night Bundle and Holographic Trio papers.
~  Emboss and Die-Cut the Holographic foil sheet.
~  Die Cut and Stamp the gift tag.
~  Accent with the Lost Lagoon ink and die-cut stars.
 What do you think??  Please Share Me and This with a Pin, Email, Facebook post, Tweet.. and Join Me with a follow on these avenues like Pinterest and YouTubeInstagram, LinkedIn and Foursquare! Get even MORE Getting Crafty and Stamping with our Exclusive Mailing List and it's many rewards!!

Monday, November 27, 2023

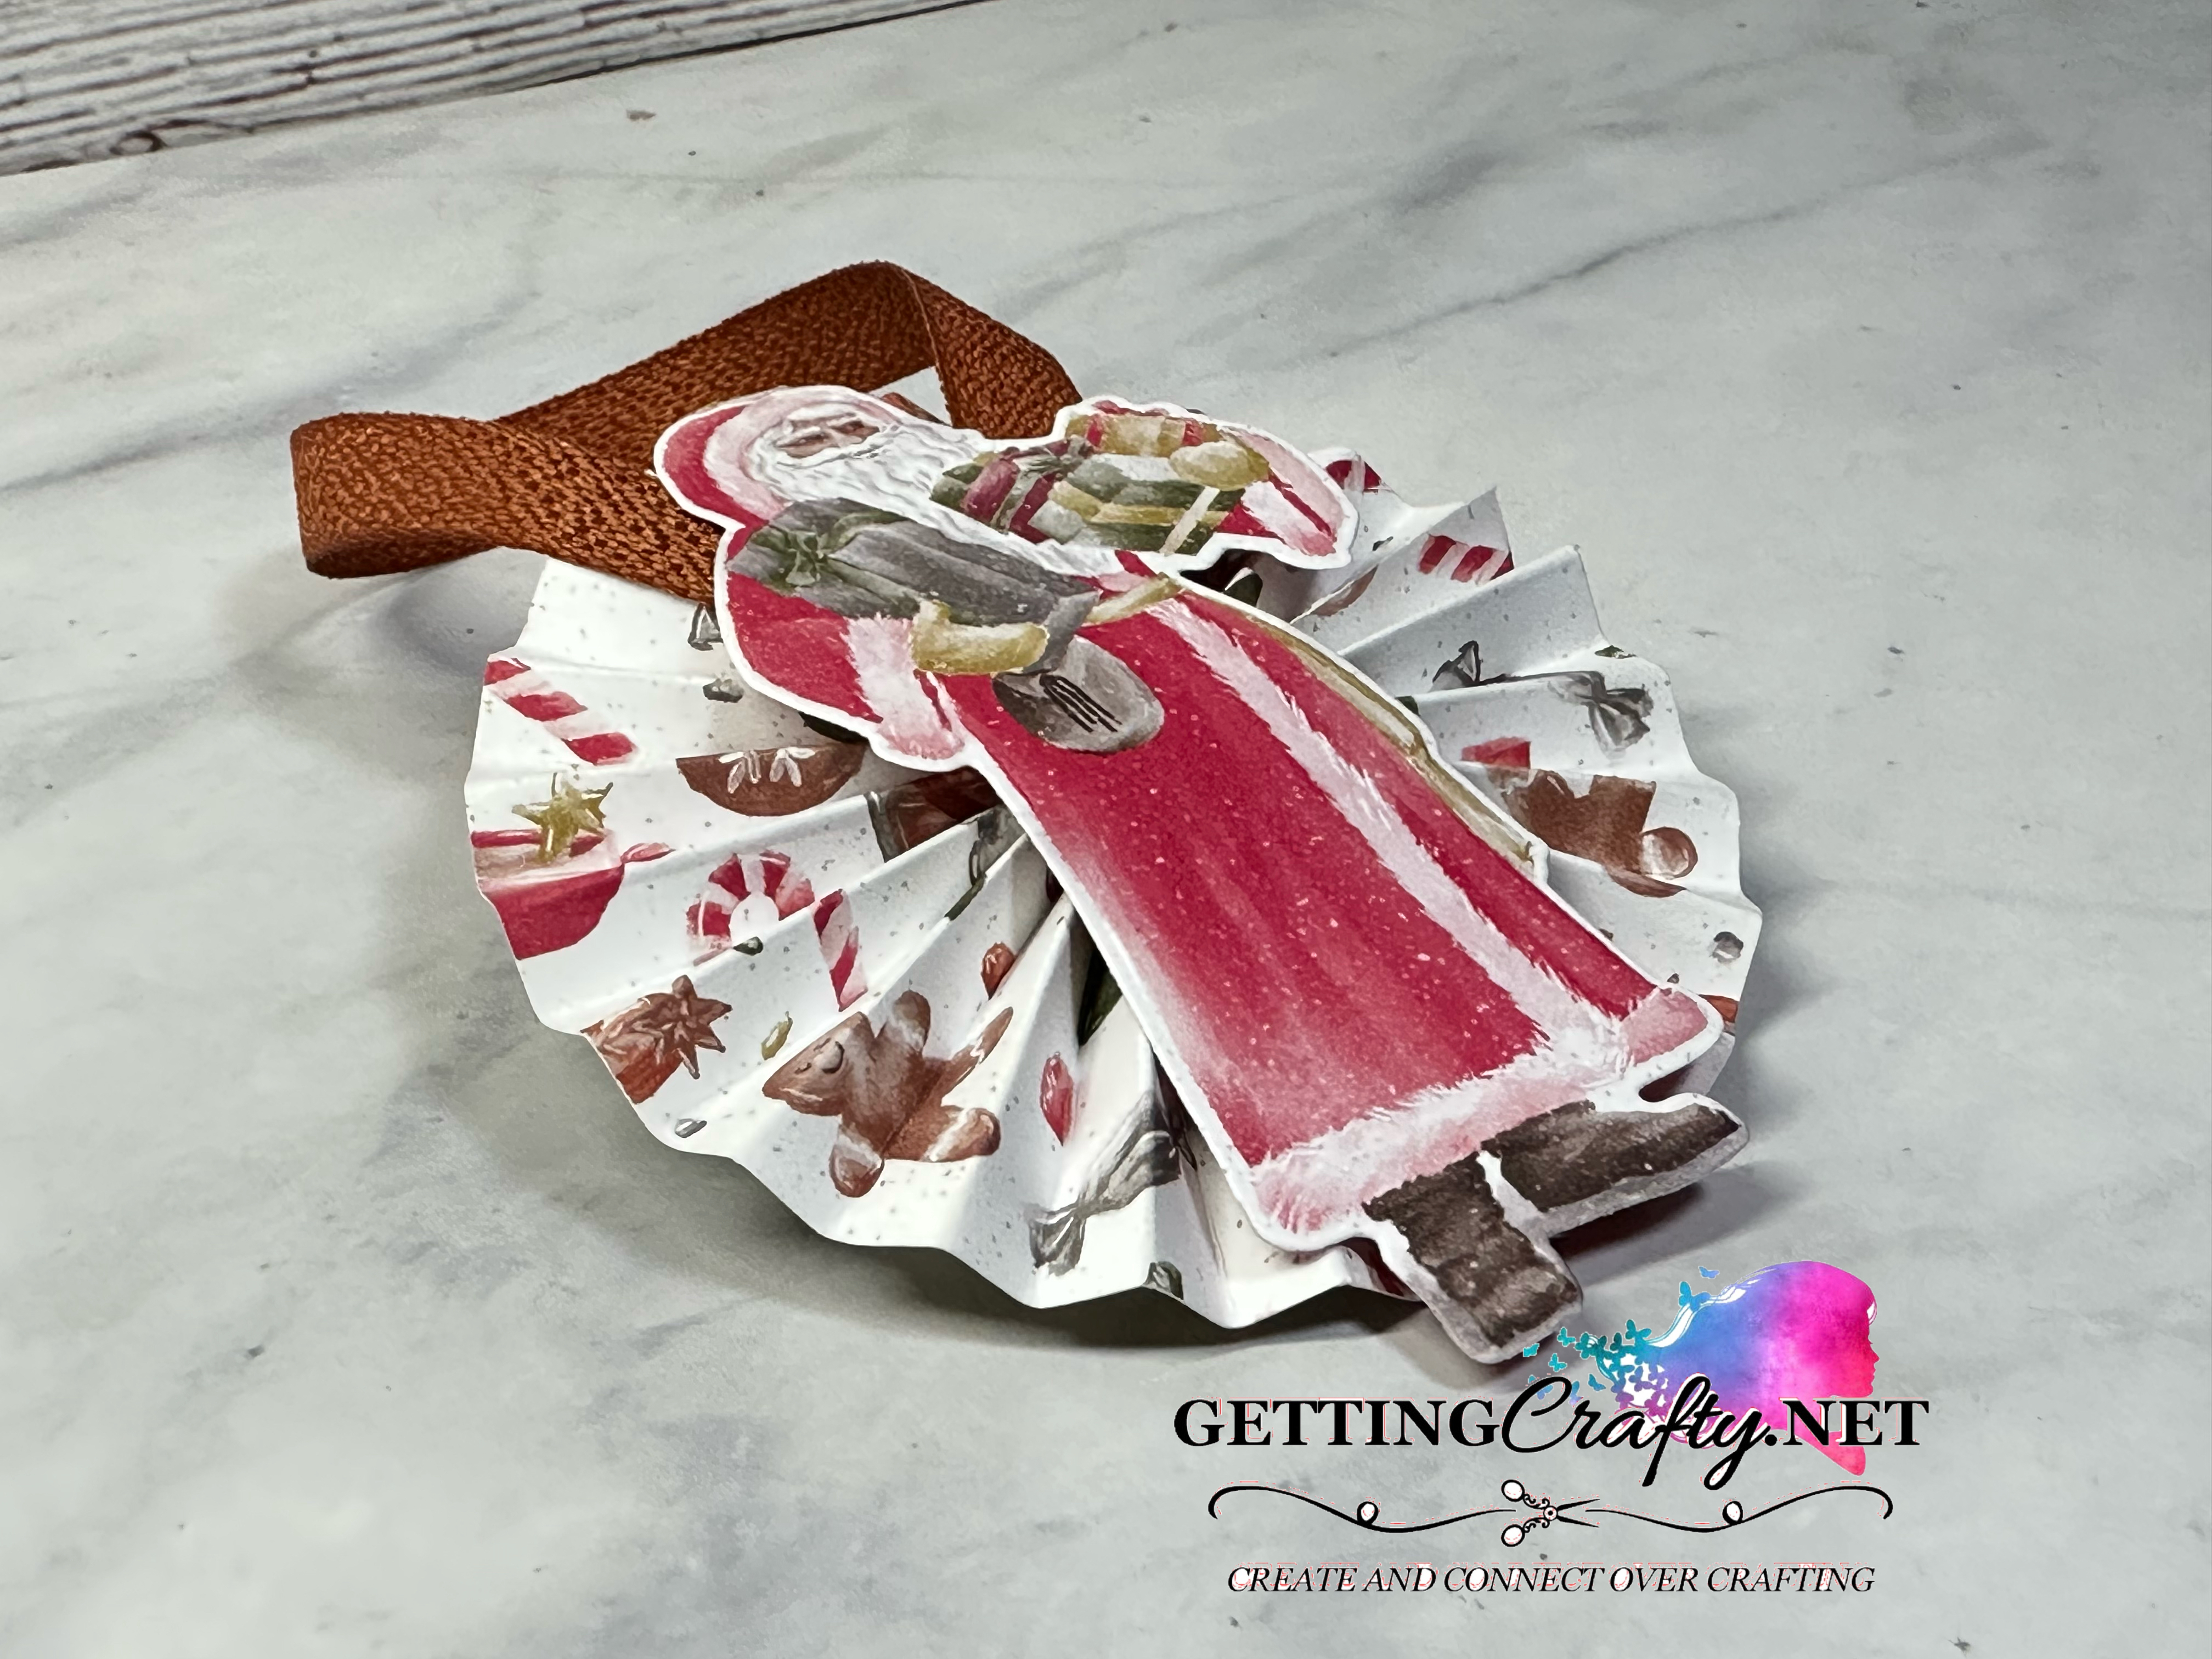
Using Up Your Scraps!! Stampin’ Up! Gift Tag & Ornament

I love a fun, easy and creative way to WOW others... this DAY ONE of our Twelve Days of Christmas is a FABULOUS Way to Use Up Your Scraps while creating a memorable Gift Tag, Ornament or Bottle Topper.  I attached the VERY Hot Glue Gun that I have coming my way as a WIRELESS version is dreamy!!  I love the combination of the Saint Nicholas Bundle with the Coordinating Traditions of St. Nick Designer Series Paper, don't you?? 
 

Disclosure: Links contain affiliates. When you buy through one of our links we will receive a commission. This is at no cost to you. Thank you for supporting Getting Crafty with Jamie and allowing us to continue to bring you valuable content.

Getting Crafty November 2023 

*Hostess Code Z9R9YPAC
- JUST COPY & PASTE THIS CODE

**OR... If you Order $150 or more - Score the Hostess Shopping Spree !!


Create this Using Up Your Scraps!! Stampin’ Up! Gift Tag & Ornament  Video Tutorial 
I hope that you enjoyed this Video
Don't forget to Sign Up and Follow my Getting Crafty YouTube Channel 

Catch our weekly LIVES and Videos on
I love this elegant and vintage looking St. Nicholas... and with the whimsical candies, gingerbread men and drinks.. it's a Sweet way to add a fun accent to a gift, gift bag or even as a bottle topper!!
Recipe:
~  1-1/2"x12" strip of the Traditions of St. Nick ONLINE Exclusive Designer Series Paper, SCORE EVERY 1/4" along the 12" side with the Simply Scored board. 
(See the video on my tips on this)
~  Fold firmly each line - creating a 'valley' on the first fold.
~  Using the Silicone Craft Sheet and Hot Glue, create a valley and lay one end into the other.
~  Die-Cut the Fifth smallest Deckled Circles Dies with the Thick Basic White card stock.
~  On the Silicone Craft Sheet (A MUST when working with adhesive - ESPECIALLY Hot Glue IMO!) apply a generous circle of Hot Glue.
~  Apply and 'squish' the circle into a tight look - watching out for the Hot Glue to leak or POP up the center.
~  Apply the Copper Clay ribbon with the Hot Glue.
~  Die-Cut the Santa with the St. Nick Bundle Dies and the STUNNING paper (talk about an EASY way to create a vintage and beautifully colored in image!).
~  Adhere to the front with more Hot Glue.
(You CAN use our Stampin' Dimensionals or Mini Glue Dots on this part.)
Spice it Up...
~  Adding a dash of sparkle to good ol' St. Nick with our Wink of Stella glimmer brush!!
This back piece is such a great way to leave some words, thoughts and love!
Make sure you SIGN and Date it... I do this on ornaments I've received over the years and love reflecting on who gifted them to me!
 What do you think??  Please Share Me and This with a Pin, Email, Facebook post, Tweet.. and Join Me with a follow on these avenues like Pinterest and YouTubeInstagram, LinkedIn and Foursquare! Get even MORE Getting Crafty and Stamping with our Exclusive Mailing List and it's many rewards!!

Wednesday, December 18, 2019

Taking that ride..


I love seeing my kids grow... and when they take the wheel - I'm praying that Jesus is doing it for them lol.  Today my son passed his Permit test.  WOW.  I've reached THAT stage of mom, one where today he scared the crud out of me driving on major streets - lol!  He even joined us LIVE as we created this gift for our friend Craig!  Join the fun Getting Crafty Advent LIVES at Facebook.com/GettingCrafty.net as today this new driver joined the creating!  
****
Use this Hostess Code (at check out) and 
I'll send you a delightful gift in the mail!
****
December Code:  Y3AYD2KZ
(Feel Free to Copy and Paste in in the Check Out area.)
We just love our friend's the Caseys.. and Craig has been amazing at organizing a local vintage car show bi-weekly.  Grabbing this fabulous cup I couldn't resist, with the help of my son, to create a fun gift-tag to top it all.  
~  Cutting 2" x 5" inch strips of Very Vanilla card stock.
~  Punch the Delightful Tag punch on one edge.
~  Punch the Banner Triple punch on the other end.
~  Stamp the Ride with Me greeting in Old Olive ink on one.
~  Stamp the Ride with Me truck and tree on the other in Memento black ink.
~  Coloring is so much FUN with our Stampin' Blends!  Using the Black, Old Olive and Cherry Cobbler combos, I start with the Dark and blend out with the Lighter (see the Video as I show this exact technique).
~  Even coloring accidents happen - and I've been coloring for YEARS... that is where the Color Lifter comes into play to save the day!  Using it to fix a color mishap to adding another level of color... have fun with it!
~  Add Sparkle with the Wink of Stella (Shouldn't all fabulous rides have sparkle?! My son encouraged it!).  
~  Assemble on this stunning 5"x 2.5" strip of the Toile Tidings with Stampin' Dimensionals. 
 I write out my greeting BEFORE assembling this side.
I made the boo-boo of adding Albanese's because the apostrophe when signing a name. Thank goodness my friend's will have grace, lol.  
Tie it on the top of the straw (so I can add candies and a gift card to a car place for our friend and his own vintage ride!).  This Double Stitched Ribbon in Garden Green matches PERFECTLY while looking so cute on this gift!  
I can imagine that this'd be a fun 'ornament' to even tie on their tree.
Snagging this cute cup from The Dollar Tree (Squeee!)... I can't wait to grab a few more!  We will be making some 3D Trucks with the dies and giving them to those who bring cars on Saturday!
This Saturday the Conejo Valley Cars and Coffee is meeting for an Ugly Sweater and Toy Drive.  I love the heart of our community.  These men have been so gracious with their time.  I grew up a car girl and seeing my son and daughter have these car men answer questions and help out has been a blessing!
We even met Steve at the car show.  He's a collector and even gave us the opportunity to buy this car - his dad was the original owner!  Today Sal reached a dream and passed his test... I'm buying this 1975 Ford Ranchero GT and will give it to him when he graduates!  What a wonderful (and scary) season in life!  God is so good!  
Don't you just LOVE how this gift tag matches this cute cup?!
  What do you think??  Please Share Me and This with a Pin, Email, Facebook post, Tweet.. and Join Me with a follow on these avenues like Pinterest and YouTubeInstagram, LinkedIn and Foursquare! Get even MORE Getting Crafty and Stamping with our Exclusive Mailing List and it's many rewards!!
  
Then JOIN our Getting Crafty LIVES (and the Advent LIVES during December) at Facebook.com/GettingCrafty.net

What Others are SAYING about Getting Crafty with Jamie

Jamie is so passionate and creative about making cards - and wants everyone else to join her in the fun! She is so encouraging and positive in her attitude, helping me along when I get frustrated - and then rejoicing with me at the finished product! I love going to her classes to get new ideas, learn techniques, and have loads of fun in the process. ~ Christine C.

Jamie has wicked awesome classes! If you don’t like a particular stamp or paper/ink color Jamie wants you to change it to suit your style! I did my sister-in-law’s entire bridal shower from invitations/thank you cards, party favors to decorations, it was quaint and whimsical! Everyone ooh’d and ahh’d! I’ve had lots of special requests for classes and Jamie delivers; she always has tasty treats and flavored coffees too ~Ashley W.

I have been attending Jamie's classes for over a year. Her ideas for cards are fresh and fun. She always tries to have several different styles of cards available, so everyone gets to make cards that fit their personal style. The techniques she shows each class can be used in many different applications. She is very patient teacher when instructing class members on how to use the Stampin Up products. ~ Carol D.

If I looked up the word sparkle in the dictionary, I would find Jamie Albanese picture there. I have had the sweet blessing of knowing Jamie and her family for over 5 years now. Every time I am with her I feel loved and inspired. When I am in one of her classes I feel my creative juices flow, as she encourages me to go outside my comfort zone. Jamie helped our girl scout troop make cards for a soldier who needed some encouragement!!! For any of you who have not been in one of Jamie's classes, please don't let another day slip by. She is a beautiful friend and she will become yours too. ~ Blessings, Karen:-)

Jamie has a great eye for style and flair, and it shows in her work. Yet she can pick up on your own individual style and makes great recommendations. I love that she is always flexible for last-minute decision maker mommies like me! So much fun to host craft events with your friends and family - that personal touch always means so much. ~ Adonna

Total Pageviews