Bootiful Occasions is a favorite stamp set of mine. I couldn't resist incorporating it into a card for my Holiday class. Nabbing my Labels Collection Framelits, Big Shot, heat gun and black embossing powder, Elegant Eggplant, Wisteria Wonder and Lucky Limeade Stampin Write Makers.
With Wisteria Wonder cardstock as the base, using the 3/4" & 1-1/4" circle punches to create the Lucky Limeade random circles.
Stamping the Boot on Very Vanilla with Versa Mark ink and powdering it w/the black embossing powder. Heat setting it creates a fun patent leather look! I dooo love myyy boots and shiny is just so yummy!
Creating Lucky Limeade and Wisteria Wonder colored in circles on the boot and striped heals. The Elegant Eggplant just adds a little elegance to the boot and backdrop of layered label. The Stampin Dimensional adhesive adds depth and layers to the card.
So, it's almost Halloween, Grab your broom, go and Shake Your Booty!!
Wednesday, October 24, 2012
Tuesday, October 23, 2012
Elegance and Lace in Mosaic
I've yearned to learn the art of Mosaic. Maybe it's the shattering of tiles and dishes (I do love to get my frustrations out, lol) or maybe it's just the artist heart in me.... This week the LNS challenge was cards that incorporated the Mosaic tile look. (Ya whoo!)
So using the Early Espresso cardstock base, ink and Pumpkin Pie cardstock, Teeny Tiny Wishes stamp set, Champagne Glimmer Paper and the Word Window and Extra-Large Oval punches, and Holiday Frame and the Lacy Brocade Impression Embossing Folders and Big Shot, Oh! Don't forget the brayer... It results in a stunning Fall/Happy Thanksgiving card!!
I brayered the Holiday Frame folder with Early Espresso ink, ran Pumpkin Pie paper inside and through the Big Shot. If you look closely you will see a Christmas Tree and Ornaments in the impression but don't care as it looks sooo amazing!! Cutting it out and layering it on the Lacy Brocade impressed Early Espresso card base.
Punching the Extra-Large Oval in Champagne Glimmer Paper and adhered it to the Mosaic looking Oval with SNAIL adhesive. Layer the punched Happy Thanksgiving on top with Stampin Dimensional adhesive and then the large oval on the background with more Dimensional adhesive octagons!
It's an easy card that mimics a lacy mosaic look. I LOVE this look, so elegant and isn't it amazing how Christmas inspired a festive Thanksgiving looking card!! Comments are sooo appreciated! Thanks for looking!
Monday, October 22, 2012
Lovely as a Tree for me
Do you find that there is a stamp set or two that you would never let go of, use as a staple, just love?? Lovely As A Tree is that stamp set for me! Here is a fun card that I did simple but then changed up a little with the 2nd card.
Starting with Crumb Cake paper as the base I used the Amazing Fan Fair Designer Series Paper (DSP), Curly Cute stamp set, Gold embossing powder and our great new embossing gun (sooo quiet and sleek!), the Big Shot, Woodgrain embossing folder from the Holiday mini, Island Indigo cardstock as the frame for the stamped DSP and Red Riding hood ink.
This DSP is sooo right in sooo many ways! The mixture of colors, patterns, sigh... I stamped this grove of trees on the DSP with Red Riding Hood ink. You can see how on the card w/the DSP that has very little red in it, stamping it w/this red brings out the "hidden" red in the page.
I ran the DSP thru the folder and big shot on one card and then the DSP that was adhered with SNAIL adhesive on the Island Indigo paper "frame".
I stamped the leaves on the two corners of one card and not on the other with Crumb Cake ink on Crumb Cake paper, such a simple look but quite elegant.
Threading the Early Espresso 1/8" Taffeta ribbon thru the New Naturals Designer Buttons. Both look great, do you like the simple knot or the bow?? The dark button or the lighter?? The extra stamped leaves or the clean and simple "white space/Crumb Cake space"??
The embossed Curly Cute greeting stamp set is elegant and universal as it covers so many occasions! I love the gold on this neutral and natural card.
I hope you cherish the many stamp sets we have but hold tight to those staples and favorites that are so lovely!
Sunday, October 21, 2012
All the leaves are brown and the sky is grey...
(Admit it, that song is in your head now, isn't it?? If you don't know that so g, get it! The Mammas n Pappas did this song well!).
My fun Fall tastic class was a blast! Here is a fun card that started off clean with tons of "White (So Saffron) Space" for the LNS challenge this past week.
Starting with the Autumn Accents Bigz Die, the Big Shot, Champagne Glimmer Paper, Howlstooth & Scaringbone DSP, So Saffron cardstock for the card base, Perfectly Penned sentiment stamp set and Chocolate Chip ink.
You can see the two different cards here. The 'Celebrate Today' card is my original "clean" card. I punched out the leaves in More Mustard paper with the Autumn Accents Bigz die and Big Shot. Crumple the leaves then rub the creases with a sponge dipped in the Chocolate Chip ink. The edges and the crumples looks amazing!
Punch out acorn or smaller leaf with the same die and the Champagne Glimmer paper. Layer and adhere with Stampin' Dimensional adhesive. I used only one or two Dimensionals so the the realistic flow and movement of the leaves added to this cards Fall feel!
The DSP is in More Mustard and So Saffron is the monochromatic sister to it. Stamping the Chocolate Chip inked and placing it on the DSP. The Perfectly Penned greeting stamp set is so curly n lovely.
On the Happy Birthday card I showed my class how to use the cardstock that was left behind, the sponge and created additional depth and interest with a stenciled shadowed leaf on the page. I like how the two acorns look here, layered and one looks like it rolled away. The shadowed leaf under it justs adds a little interest.
You can see here how the Celebrate Today is loaded with "White Space" in So Saffron. I like how adding the shadows changes up the card, too!
Thanks for looking! Tell someone about it!! Comments are sooo appreciated! Have a Fall-Tastic day!
My fun Fall tastic class was a blast! Here is a fun card that started off clean with tons of "White (So Saffron) Space" for the LNS challenge this past week.
Starting with the Autumn Accents Bigz Die, the Big Shot, Champagne Glimmer Paper, Howlstooth & Scaringbone DSP, So Saffron cardstock for the card base, Perfectly Penned sentiment stamp set and Chocolate Chip ink.
You can see the two different cards here. The 'Celebrate Today' card is my original "clean" card. I punched out the leaves in More Mustard paper with the Autumn Accents Bigz die and Big Shot. Crumple the leaves then rub the creases with a sponge dipped in the Chocolate Chip ink. The edges and the crumples looks amazing!
Punch out acorn or smaller leaf with the same die and the Champagne Glimmer paper. Layer and adhere with Stampin' Dimensional adhesive. I used only one or two Dimensionals so the the realistic flow and movement of the leaves added to this cards Fall feel!
The DSP is in More Mustard and So Saffron is the monochromatic sister to it. Stamping the Chocolate Chip inked and placing it on the DSP. The Perfectly Penned greeting stamp set is so curly n lovely.
On the Happy Birthday card I showed my class how to use the cardstock that was left behind, the sponge and created additional depth and interest with a stenciled shadowed leaf on the page. I like how the two acorns look here, layered and one looks like it rolled away. The shadowed leaf under it justs adds a little interest.
You can see here how the Celebrate Today is loaded with "White Space" in So Saffron. I like how adding the shadows changes up the card, too!
Thanks for looking! Tell someone about it!! Comments are sooo appreciated! Have a Fall-Tastic day!
3x3 Me!!
I adore street fairs!! My husband doesn't like the crowds, people, spending money, animals... Lol. Loving my antisocial hubby, I left him at home while I scoped out and visited the local street fair today!
Today I reserved my own corner booth for next year! As I walked a out, I handed out lil love packages w/a variety of whimsical Merry Christmas cards and my business card.
Thanks to the LNS challenge of clean cards w/white space I created these fun lil cards with our Scentsational Season stamp set (holiday mini) and our Greeting Card Kids stamp set from the Idea Book. The Teeny Tiny Sentiments stamp set has the cutest sentiments that cover nearly every holiday!
Our Chocolate Chip, Old Olive, Midnight Muse and Real Red inks all worked together to create fun lil 3"x3" white cards.
Our adhesive backed Rhinestones and Pearls add a lil flair to these white space, clean cards.
Going minimal is a challenge for me but I love the results, especially on a sweet mini card! What do you think?? Comments are appreciated! Thanks for looking!!
Saturday, October 20, 2012
Nov 1 ~ Dec 16th
Join In on the Fun!!
~ Host a Private Class (w/ $450 in Sales) and Earn BONUS Gifts
(On Top of the $65 in Hostess Dollars, +50% off any 1 Item)
**** PICK A Color Family and Receive The Stamp Pads from said family!! WOW!!
** Tons of FUN, Me + Custom Projects to YOUR Style + Family and Friends =
Award Winning AWESOME-Ness!!
~ Join My TEAM!!
* Our Amazing $99 Custom Kit
**** PICK A Color Family and Receive The Stamp Pads from said family!! WOW!!
(+ You Pick it ALL!! A HUGE Savings, Earning Potential and Friend Making!)
** ME as your Team Leader...
* Amazing Team of Fellow Demonstrators who Love Stampin' and Makin' Spare $$!!
Stampin' Up! Is Thanking YOU for Joining In On The FUN!!
I'm Grateful to have you in my life!
Let's Schedule the FUN!!
Friday, October 19, 2012
Cool Winter's Night
Nabbing my Big Shot, Northern Flurry Folder, heat gun and embossing powers (I prefer the All Silver card). With Night of Navy cardstock, Versa Mark stamp pad and the Delightful Dozen stamp set, this card came out soooo "cool".
I started by running the cardstock in the Northern Flurries Folder and dry embossed the snow flakes. Then I powdered the page reallllly well with the Embossing Buddy.
With the Versa Mark pad I stamped the Merry Christmas and a Happy New Year from the Delightful Dozen stamp set. Then carefully drag the Versa Mark pad across the raised snow flakes from the dry embossing folder.
Cover with the Silver embossing powder (I did the silver and the Iridescent Ice across the snowflakes, originally. I did NOT like this look and redid the rest in the Silver and preferred that look!) The sentiment and the snow flakes POP on the Night of Navy paper.
Taking a Whisper White cardstock and I punched out the 1 1/4" Scallop Circle Punch. Then cover it liberally (I pushed it into the Versa Mark pad) then apply the Silver powder. I did this one more time. While the heat gun was keeping the silvered scallop warm, stamped my Snowflake from the Mixed Melody stamp set into the Versa Mark pad then (quickly) into the silver scallop while still hot! I had to do it twice to achieve the look I liked. Soooo if you stamp into the Silver and don't like the results, reheat and then (quickly) and Firmly re stamp into the heated scallop.
Remember that it'd be challenging to get it perfectly lined up as it has to be quick and hard to achieve a good impression. Too, snowflakes do NOT have to be perfect, so revel in the imperfection.
I added an adhesive backed Rhinestone to the center of the impressed upon embossed scallop to add a dash of more shine and sparkle. Love it!!
I love this look, this elegant card has tons of open space and yet looks great! Minimal embellishment with HUGE impact! What do you think? Does it Shine for you?? Don't you agree with it all being Silver?? I doooo! Have a bright and shiney Holiday Season!!
Thursday, October 18, 2012
Dear Santa
Christmas is 10 Weeks from now...
We will have our 9' Christmas Tree up in 6 weeks...
I'm planning my classes, handmade gifts and the 200+ Cards I send each year.
I look forward to baking, shopping with my family, wrapping my gifts, Pine Tree Scents, Pumpkin and Apple Pies, Honey Baked Hams... sigh... Fires in my fire place, spiced cider and dark chocolate hot cocoa with a peppermint stick swirled in it...
I know that I may have many slip-ups during the year but 'Santa Baby' sings loud in my head. I imagine myself as Marilyn with my make-up just so, a pair of kitten heals on and looking amazing... sigh...
I LOVE the Ad Campaign that Stampin' Up! has created! Are YOU ready for this Holiday Season??
If not, let's schedule some FUN!!
Apples, Fresh Apples For Sale!
Living where we do, we are close to many farmers markets, it's amazing at how many fresh foods we get weekly! I see, often, many fruit trucks selling fresh produce (especially strawberries ~ yummm).
This truck gives me sweet smiles as I love apples, making pie.. Sigh. I wanted a rustic but clean cut card that embraces Fall! The LNS challenge is clean cut cards with much white space... This is rustic but elegant card has a ton of white (Very Vanilla) space.
The Color Coach takes Real Red and pairs it with Pumpkin Pie and Early Espresso. Stamping the Countryside stamp set's truck with Early Espresso ink on a Very Vanilla paper. Coloring in the yummy apples with our Real Red Stampin' Write Marker, Pumpkin Pie Stampin' Write Marker for the truck. The not-in-this-pairing-but-works-cause-it-is-on-the-color card (do you like that!??! Lol) is Crumb Cake and I used this to color in the grass and interior of the truck, baskets and hub caps on this "older" truck.
I know it needs "more" so I nabbed our lovely, easy to use, get your frustrations out (lol) Paper Piercing Tool, Mat, and Essentials Paper-Piercing Pack. Adding two lil rows going across the bottom and up one side. It's a subtle but rustic addition to the card.
Our cute Teeny Tiny Wishes stamp set has almost every sentiment that you could need! I used this under the new pierced lines the Friend to Friend in Real Red with my Stampin' Write Marker. Myyy teeny tiny daughter wanted to model it, wouldn't you buy an apple from her?? He, he, he...
A fun, easy Real Red and rustic card that has the essence of Fall!! Stamping the apple from the Countryside stamp set on the envelope and coloring it in allows for a sneak peak at what's inside! Don't you just smell the apples, hear the Fall leaves crunching under your boots?? Happy Fall Y'all!!
Wednesday, October 17, 2012
Floral District in the Summer Solstice
Sounds like a great location, right?? As I created a simple and clean but floral loaded card.
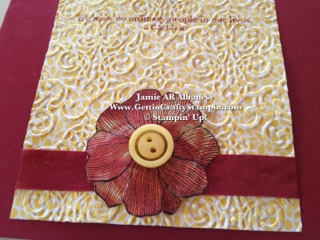
With Cherry Cobbler cardstock as the base, the Daffodil Delight leaved patterned DSP and Shimmer paper it is a fun and easy way to have an elegant impact. Using Daffodil Delight and Cherry Cobbler reinkers and a baby wipe it creates a liquid tie-dyed look.
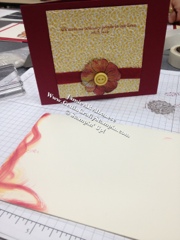
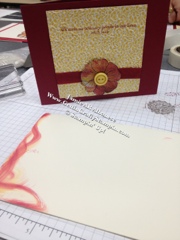
Starting with Cherry Cobbler ink stamping this sentiment "We meet no ordinary people in our lives." From the Summer Solstice stamp set.
A narrow sentiment or stamp issss a challenge! I stamp daily and I still can mess up a paper with a rocking motion, more probable with a narrow stamp. So you can see how flipped the paper over and carrrrrrefully re-stamped the sentiment.
Howwww does one fix a problem like a line around a sentiment?? Ribbon!! Whipping out the Cherry Cobbler Seam Binding I covered the boo boo and you can't even see it while the card looks sooo lovely with the addition.
I did run the DSP through the Big Shot and our Stunnnnnnning Lacy Brocade embossing folder. It may not be in your face as its subtle over the patterned DSP but it does add a lil something extra!
Taking a 2 1/2"x2 1/2" Shimmer White cardstock and a baby wipe that i folded into a smaller, more manageable piece. With the Cherry Cobbler and Daffodil Delight re-inkers i dropped lil drops and created a lil stamp pad. Swirling the colors for a liquid, tie-dyed look on the Shimmer White. Allow the white to peak thru as flowers often have streaks of color and light.
With Early Espresso ink stamped the flower for the Summer Solstice stamp set. Cutting out said flower and into the leaves a little adds to the fluid look of this flower. I adhered it with the Stampin' Dimensional adhesive. Using our Daffodil Delight button from the Brights collection to tie this all up.
What do you think? Did you know baby wipes are for more than tushies?? Grab that wipe and schmere the edge of the envelope to tie it all together. Tie-Dyed elegance! The LNS gang challenged us to make clean, simple cards w/White Space. I think this does that, don't you??
Subscribe to:
Posts (Atom)
What Others are SAYING about Getting Crafty with Jamie
Jamie is so passionate and creative about making cards - and wants everyone else to join her in the fun! She is so encouraging and positive in her attitude, helping me along when I get frustrated - and then rejoicing with me at the finished product! I love going to her classes to get new ideas, learn techniques, and have loads of fun in the process. ~ Christine C.
Jamie has wicked awesome classes! If you don’t like a particular stamp or paper/ink color Jamie wants you to change it to suit your style! I did my sister-in-law’s entire bridal shower from invitations/thank you cards, party favors to decorations, it was quaint and whimsical! Everyone ooh’d and ahh’d! I’ve had lots of special requests for classes and Jamie delivers; she always has tasty treats and flavored coffees too ~Ashley W.
I have been attending Jamie's classes for over a year. Her ideas for cards are fresh and fun. She always tries to have several different styles of cards available, so everyone gets to make cards that fit their personal style. The techniques she shows each class can be used in many different applications. She is very patient teacher when instructing class members on how to use the Stampin Up products. ~ Carol D.
If I looked up the word sparkle in the dictionary, I would find Jamie Albanese picture there. I have had the sweet blessing of knowing Jamie and her family for over 5 years now. Every time I am with her I feel loved and inspired. When I am in one of her classes I feel my creative juices flow, as she encourages me to go outside my comfort zone. Jamie helped our girl scout troop make cards for a soldier who needed some encouragement!!! For any of you who have not been in one of Jamie's classes, please don't let another day slip by. She is a beautiful friend and she will become yours too. ~ Blessings, Karen:-)
Jamie has a great eye for style and flair, and it shows in her work. Yet she can pick up on your own individual style and makes great recommendations. I love that she is always flexible for last-minute decision maker mommies like me! So much fun to host craft events with your friends and family - that personal touch always means so much. ~ Adonna