Showing posts with label Rustic. Show all posts

Thursday, February 21, 2019

Home to Roost and shine....

I love our life on our small farm.  I contemplate adding chickens often.  At this time, we are sticking with our small goats.  Until then... let me create with this stunning Home to Roost Card collection.  Score tons to create handmade cards and this Home to Roost stamp set for FREE!  I know... I keep TELLING YOU and EVERYONE (lol) that I don't like Pink.. and I DON'T.. honestly.  It's OK, I guess but NOT a go-to for me.  This stunning Petal Pink card stock, with the Wood Texture Designer Series Paper goes soooo well together though.. adding a POP of WOW with the Copper and Wink of Stella glimmer pen.. eeek, I may like it after all (not really but it's OK and pretty here - lol).
BOOK Your OWN Private Class that will Highlight the card styles 
or techniques you are interested in!  With my designing cards for YOU, 
Book a FUN Gathering of family and friends to create!  
From fun Holiday Cards to Celebrations... 
perfect for stocking up to make cards all year long!!   
Order from the NEWEST Catalog  
Use this Hostess Code (at check out) and 
I'll send you a delightful gift in the mail!
****
74NN9SND 
SCORE your own new catalog when you Shop with Me online or in-person, Join our New Catalog Create with us or Email Me so I can send you your own.
I adore how fun and easy this was to make.  I adore giving the gift of a handmade card.  Adding on this beautiful Copper Foil and Metallic Thread for a WOW element.
~  Stamping this Roost (can I JUST SAY - I adore the awesome ease of using the new CLING Stamp Sets!!!) in Soft Suede ink on this Wood Textures designer series paper (4"x5-1/4").
~  Stamp the wheat once, then stamp around it with out re-inking (this is called Stamping Off) for this fun textured background.
~  Using the INCLUDED Watercolor Pencils in Calypso Coral, Bermuda Bay and Pacific Point.
~  Watercolor with GLITTER - using our Wink of Stella Glimmer Pen and BAM - it's stunning!
~  Loop the Copper Metallic Thread around my fingers.
~  Adhere 1/4" x 4-1/4" Copper Strips with SNAIL adhesive.  
~  On the middle one - add the looped thread for this fun element.

Creating this fun, rustic card was easy with the Home to Roost Card Suite!  
YES - it actually includes... 
Items included
* Wood Textures 6" x 6" Designer Series Paper
* Nature's Poem Cardstock Pack
* Soft Suede Classic Stampin' Pad
* Watercolor Pencils
* 3/16" Braided Linen Trim
* Tin Tile Dynamic Textured Impressions Embossing Folder
* Stampin' Dimensionals

ALL In One Collection 
Order with ONE item number and receive ALL of this
- Ready to Create with and it has this stunning FREE Home to Roost stamp set!
Create some Rustic Glam with a beautiful hand crafted card!
I hope that you enjoyed this Video. 
Don't forget to Sign Up and Follow my Getting Crafty YouTube Channel.
 What do you think??  Please Share Me and This with a Pin, Email, Facebook post, Tweet.. and Join Me with a follow on these avenues like Pinterest and YouTube, Instagram, LinkedIn and Foursquare! Get even MORE Getting Crafty and Stamping with our Exclusive Mailing List and it's many rewards!!

It's ME - a little bit country, a little bit rock n roll (or glam!)... a pretty handmade card sure to bless.  Who would YOU send this card to?!  Create it and more with us on our Facebook.com/GettingCrafty.net LIVES every Monday!  Double your crafting pleasure when you score the BEST Deal in Town with our Starter Kit, Bonus LIVE and MORE!  Join us ~ check out our Crafting, Card Making and Pinterest Craft Nights and create great gifts and more monthly with us! 
SCORE the BEST Deal in TOWN!!
Create with Us EVERY Monday at a BONUS Facebook Live in our Getting Crafty Family Group.... with the BEST Savings on ALL of your crafting supplies, Free Items, add in Creating and Connecting over Crafting and Card Making in our Group with Challenges, Training, Prizes and Gifts!
ON SALE NOW ~ Through March 31st!

Sunday, March 9, 2014

Squeak with this hand-stamped mouse punch-art card

I adore animals.. even cute little mice (as long as they are in cages).  Creating this cute card hand-stamped punch art mice card for our recent Punch Art Card Class was a sweet way to deliver some smiles.  Squeak some greetings in with this cute card.  Did you miss out on my recent class?  Don't be blue, click here to see upcoming classes waiting on YOU!
Create this hand-stamped punch-art card with:
Hardwood background stamp (#133035)
Label Love stamp set & Coordinating Artisan Label Punch BUNDLE (Saving 15%!! #132722)
1-3/4" Circle Punch (#119850)
Full Heart Punch (#119883)
Itty Bitty Punch Pack (#118309)
Sahara Sand card stock (#121043)
Very Vanilla card stock (#101650)
Blushing Bride card stock (#131198)
Crumb Cake ink (126975)
Rhinestone Jewels (#119246)
Gold Baker's Twine (#132975)
Glue Dots (#103683)
Stampin' Dimensional Adhesive (#104430)
Black Permanent Marker
 
This sweet little mouse was inspired by a cute hair-bow in a my daughter's friend's hair.  I couldn't resist recreating it with my own little twist.
The highlight of a field trip we made to a Compost Plant (ewwww) this cute bow was a sweet find (and better than seeing the alive kind).
The Label Love BUNDLE (saving 15% - YAY) has a great collection of sentiments.  Stamping this 'best friend' greeting with Crumb Cake ink on Blushing Bride card stock, it pops out and ties perfectly in with this punch-art card.
 
Create these cute punch-art mice with our 1-3/4" Circle Punch for the 'body'.  The Full Heart punch folded in half adds towards to look of a face.  Curl the edges of the 'ears' with the side of my Bone Folder for a raise look.  Add this cute nose with the flower punch from the Itty Bitty Punch Pack and the Blushing Bride card stock.  Adhere to the tip of the heart with the Glue Dot.  Trim it down, from behind, so it looks like a cute nose!
This cute but rustic card is adorable with the aide of the Hardwood background stamp using Crumb Cake ink on the Sahara Sand card stock card base.  This reminds me of a cute barn door look.. perfect for this adorable mouse!
 
Create these sparkling eyes when you color in our adhesive backed Rhinestone Jewels with a permanent marker (like a Sharpie or Bic, etc.).  They stick on and shine like onyx for a pretty accent.  (Mice have red eyes, but I figured that would look scary, lol, and skipped that.)
 
Tie on a cute accent with the Gold Baker's Twine as the mouse tail.  This supports the rustic look and the cute knots will surly tie on a smile or two.  See my tip on using the new Gold and Silver Baker's Twine with this cute video:
 
What do you think?  Leave a comment and let me know and any video's you'd like to see me teach!
What do you think??  Please Share Me and This with a Pin, Email, Facebook post, Tweet.. and Join Me with a follow on these avenues and YouTube, Instagram, LinkedIn and Foursquare!  Get even MORE Gettin' Crafty Stampin' with our Exclusive Mailing List and it's many rewards!!
 
Anyone receiving this card will surely squeal (the good kind vs finding a real live mouse, I'm just saying - lol).  Squeak some greeting and cheer when you create this cute hand-stamped, punch-art mouse card.  With rustic accents and a cute country feel, this card WILL go to myyyy best friend who now lives in Texas (but always was a cowgirl).  Who would you send this card to?  Leave me a comment and let me know!  Make sure YOU join in on the fun in our many card classes!!

Friday, January 4, 2013

Hanging Some Vintage Love

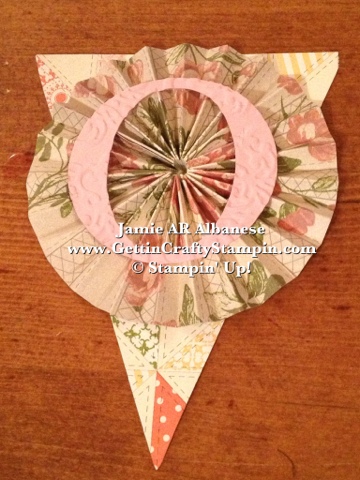
For my Ultimate Thank You Class... I created this stunning double sided 'Love' Pennant Banner.  Going Vintage with the new Tea for Two Designer Series Paper from the Spring Mini is easier than ever!

Designer Series Paper is lighter weight than Card Stock so by backing it up to the a duplicate does two things... it links it together and strengthens it as well as making it viewable from the outside of the window and the inside.... lovely!

Who wouldn't love this Vintage Love hanging in their home or office?  This is in the front window near our kitchen nook - it's sure to brighten my children's face and with the hidden adhesive backed hangers under the awning makes it so that I can change it out with the different seasons and holidays!

 The Pennant Die and Big Shot made it a breeze to pop out these for the banner, using the Simply Scored board and stylus makes it easy to create these Lollies.  Using the Die Cut L-O-V-E in Cameo Coral and Pretty In Pink I alternated them on the different pennants and they have the added vintage feel and look thanks to the Lacy Brocade Embossing folder.

 
Designer Series Paper is Double sided - so using two different sheets of this Tea for Two pack allows for the look of 4+ papers. 

HERE - Sigh with me.... this stunning vanilla 5/8" Flower is from the Flower Trim in our Spring Mini... it's great as they are connected and a stunning ribbon... but these Vintage dimensional flowers on strips of tulle can be used individually! 


Antique Brads... a favorite from the Idea Book... and with the backs covering the brad it's even more stunning!


Alternating the letter colors adds to the dimensional look... this quilted looking paper.... it's just a dream!


STOP!!  OK so make sure that as you line them up, back to back, that they are spelling the correct way - lol... our back almost came out at E-V-O-L.... lol.


Double Sided DSP (Desinger Series Paper) makes for a stunning lolly (those scored, folded circles...) Hot Glue is the KEY To adhering the ends together and them to any project!

Soooo Girly (not my usual style) and lovely...


Back to Back - Strengthening one another -
Especially when hanging and there is tension to the paper.

 
Tied together with Crochet Ribbon! 
This adds to the Vintage look and is truly lovely - I like the texture of it all, too!


I even like the knots on the end of the ribbon.... I cut them to have that V look... just like the Pennants on the Banner!
 
This will be a pleasant surprise for my kids... I may do a Name one for their birthdays... awww.... I LOVE that idea!
 
Thank you for coming by, taking a look and leaving a comment!  Please feel free to share this with others!  Valentines is right around the corner... show some LOVE to those in your life!!


Thursday, December 27, 2012

Vintage Celebrations

I love Vintage cards.... with the new products from the Spring Mini and Sale A Bration from Stampin' Up! coming your way at the beginning of January... it's easier than ever to be Vintage and make a BIG Impression!
 
 
This was going to be covering the FULL Card Front... so cutting the two Designer Series Papers (this is the Festival of Prints from the Holiday Mini) to the 4-1/4" x 5-1/2".  Cut then 1/2" strips in the card stock - one from the long end and the other the shorter end.  Then weave them... I adhere the first set of strips, when completely woven, to one another with Mini Glue Dots - this prevents them from moving and shifting the full project.
 
 
Stamping the Ferris Wheel from the Sale A Bration FREE Stamp Set (coming out Mid January, 2013!) with Early Espresso on Very Vanilla.. I used the Labels Framelit dies to punch it out on my Big Shot.  This die has a slightly Vintage feel on it's own...
 
Taking the Cherry Cobbler Stampin' Write Markers, on the pen/thin side, I added color to the lines of this amazing stamp.  It pulls in the colors from the Designer Series Paper (DSP) and adds fun and uniqueness to this wheel.
 
 
 You don't have to be PERFECT but it's easy to follow the lines for this WOW factor!
 
 Soften and add depth and a distressed factor with a Sponge and Early Espresso ink on the edges of the Ferris Wheel and the Celebrate that I stamped with Cherry Cobbler ink on Very Vanilla card stock.  The Pearls on the Decorative Label punched sentiment adds elegance to the card, too!
 
The Distress Tool from the Spring Mini ages the woven DSP and helps to lift and curl the edges... continuing the feel of this card.
 
 BAM!!  With Distressed edges to the woven DSP, I then sponged the edges of the woven paper to continue the distressed look and feel. 
 
 Seeing the lifted edges - I used my finger nail on the sponged edges of the sentiment to add more dimension and character.. the Stampin' Dimensional adhesive layers up the stamped and punched out images...
 
I couldn't resist as this card will be for my niece who turns 16 this week!!  Kaitlyn would just love the Vanilla 5/8" Flower Trim from the Spring Mini... so I added it!  It was this or more pearls... but this line of vintage flowers is too pretty to pass up!  The netting behind the material flower... it's all too perfect!! 
 
 BAM!  Stunning, Vintage, Elegant, Easy and FUN to make.. who wouldn't love to receive this card??  It's versatile enough to be more masculine by removing the flower and pearls... but my 16 year old niece - she's a style maven and is sure to love this card!
 
HERE Is a Video on How To USE the NEW Distressing Tool from Stampin' Up!
 
 
I hope that YOU take on Distressing and having FUN while going Vintage!  Thank you for coming by, looking, sharing and leaving a comment!

What Others are SAYING about Getting Crafty with Jamie

Jamie is so passionate and creative about making cards - and wants everyone else to join her in the fun! She is so encouraging and positive in her attitude, helping me along when I get frustrated - and then rejoicing with me at the finished product! I love going to her classes to get new ideas, learn techniques, and have loads of fun in the process. ~ Christine C.

Jamie has wicked awesome classes! If you don’t like a particular stamp or paper/ink color Jamie wants you to change it to suit your style! I did my sister-in-law’s entire bridal shower from invitations/thank you cards, party favors to decorations, it was quaint and whimsical! Everyone ooh’d and ahh’d! I’ve had lots of special requests for classes and Jamie delivers; she always has tasty treats and flavored coffees too ~Ashley W.

I have been attending Jamie's classes for over a year. Her ideas for cards are fresh and fun. She always tries to have several different styles of cards available, so everyone gets to make cards that fit their personal style. The techniques she shows each class can be used in many different applications. She is very patient teacher when instructing class members on how to use the Stampin Up products. ~ Carol D.

If I looked up the word sparkle in the dictionary, I would find Jamie Albanese picture there. I have had the sweet blessing of knowing Jamie and her family for over 5 years now. Every time I am with her I feel loved and inspired. When I am in one of her classes I feel my creative juices flow, as she encourages me to go outside my comfort zone. Jamie helped our girl scout troop make cards for a soldier who needed some encouragement!!! For any of you who have not been in one of Jamie's classes, please don't let another day slip by. She is a beautiful friend and she will become yours too. ~ Blessings, Karen:-)

Jamie has a great eye for style and flair, and it shows in her work. Yet she can pick up on your own individual style and makes great recommendations. I love that she is always flexible for last-minute decision maker mommies like me! So much fun to host craft events with your friends and family - that personal touch always means so much. ~ Adonna

Total Pageviews